
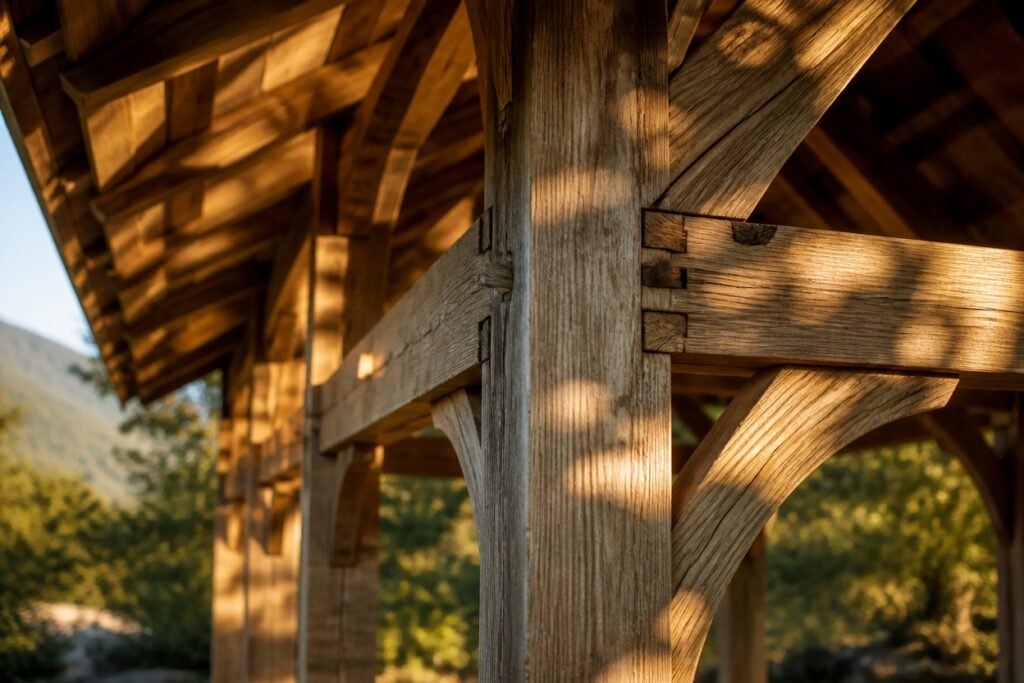
Timber frame pavilions look effortless in those glossy backyard photos. The reality is a bit more layered.
Kit contents swing wildly between brands. Some arrive with every bracket and bolt you need. Others show up as little more than stacked beams and a hardware list. Knowing exactly what sits inside that crate matters more than most people expect.
Then there are the quiet details that reshape your whole project. Foundation specs, wood species, permit requirements. Each one tugs at your timeline and budget in ways the marketing rarely mentions.
A little homework upfront keeps a weekend build from becoming a months-long pause. The difference between a space you actually use and a half-finished patio conversation starter usually comes down to these early choices.
What’s Actually in the Box: Materials, Hardware, and Delivery
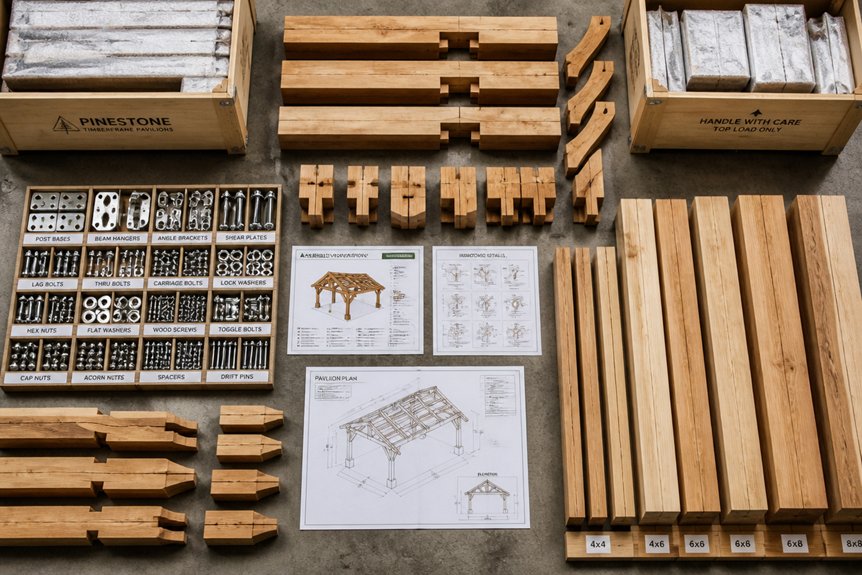
A timber frame pavilion kit arrives as a collection of pre-cut wooden beams, metal fasteners, and assembly components. Each item is organized for efficient construction.
Typical kits include pressure-treated posts, rafters, joists, and decorative bracing pieces. You’ll also find bolts, brackets, and connectors. Hardware often features galvanized steel to resist corrosion.
Delivery methods vary by manufacturer. Some ship via freight truck, while others arrange local pickup. Kits typically arrive on pallets or in organized crates to protect materials during transport.
Buyers should inspect contents upon arrival. Check for damage and verify that all listed components are present before beginning assembly.
Choosing Wood Species for Your Climate: Durability vs. Cost
Finding the Right Wood for Your Climate
Wood species differ greatly in how they handle weather and what they cost. Your local climate and budget will guide your best choice.
Pressure-treated pine fits tight budgets. It needs regular upkeep in humid areas. Cedar and redwood cost more at first. They last longer without extra treatments.
Wet and Tropical Climates
Hardwoods like ipe and cumaru handle moisture better than softwoods. Tropical regions need naturally rot-resistant species. These woods stand up to heavy rain and constant humidity.
Dry Regions
Arid areas open up cheaper options. Less expensive woods work fine here. You won’t need the same moisture protection.
Making Your Decision
Start by checking your local rainfall, temperature swings, and humidity. Weigh upfront costs against how often you’ll replace the wood. A higher initial price often saves money over time.
Mortise-and-Tenon vs. Bolted Joinery: What Strength Difference Matters
Timber frame pavilions give builders two solid paths. You can choose mortise-and-tenon joints or bolted connections. Each handles the job differently.
How the Joints Work
Mortise-and-tenon means carving a slot and fitting a wooden tongue inside. No metal needed. The wood bonds with itself for a permanent hold.
Bolted joinery drills holes through the timbers. Steel bolts pin everything together. Assembly goes faster this way.
Strength Under Stress
Mortise-and-tenon resists racking better. Wind loads hit the sides, and these joints stay rigid. The interlocking wood fights lateral movement naturally.
Bolted connections hold well enough for normal use. They just handle sideways stress differently.
Flexibility Over Time
Bolts shine when plans change. You can take the frame apart, move it, or swap pieces. Repairs need only a wrench and new hardware.
Mortise-and-tenon commits you to the design. Adjustments mean cutting fresh wood, not turning screws.
Making Your Choice
Permanent pavilions with traditional looks suit mortise-and-tenon. Prices run higher for the skilled labor involved.
Bolted frames work great for temporary builds or budgets that need flexibility. You save on labor and keep options open.
Both methods carry pavilion loads safely. Pick based on how long you need it standing, how much upkeep you’ll do, and what you can spend.
Site Prep and Foundation Footings: Depth, Spacing, and Cost
Why Footings Matter
Foundation footings keep timber frame pavilions stable for decades. Without them, structures settle unevenly within just a few years.
Depth and Frost Protection
Frost depth changes by region. Cold climates need footings 24 to 48 inches deep. Always place them below the frost line to prevent winter damage.
Post Spacing for Stability
Space posts 8 to 12 feet apart. This range prevents beams from sagging or deflecting over time.
Cost Breakdown
Concrete footings run $150 to $300 per hole. Depth and soil conditions affect the final price. Gravel-filled trenches cost less but won’t last as long.
Site Prep Essentials
Start by clearing vegetation and leveling the ground. Check how water drains across the site. Skipping these steps leads to pooling, frost heave, and structural shifting. Good foundation work pays off more than any other investment.
Permits and Zoning: Common Barriers That Derail Projects
Permits and Zoning: Common Barriers That Derail Projects
Every timber frame pavilion project starts with local permits and zoning rules. These vary widely by location. They also shape your timeline and budget.
Setback distances from property lines trip up many builders. Height restrictions and building coverage limits create headaches too. Some areas require special permits for larger structures or those without permanent foundations.
Zoning codes might ban pavilions in residential neighborhoods. Others demand specific architectural styles. Wetland rules, flood zone limits, and HOA regulations add more layers to sort through.
Your best move? Contact local planning departments early. Review the zoning ordinances yourself. Build extra time into your schedule for approvals. Handle all of this before you buy any kits.
DIY Assembly vs. Professional Installation: Time, Skill, and Total Cost
DIY Assembly vs. Professional Installation: Time, Skill, and Total Cost
Once permits are secured and zoning approval is in hand, builders face a major decision. Should they assemble the pavilion themselves or hire professionals?
Time Considerations
DIY assembly typically requires one to three weeks. The timeline depends on kit complexity and your experience level. Professional installation takes just three to five days. However, this speed comes at a higher price.
Skill Requirements
Basic kits need fundamental carpentry knowledge. Advanced designs demand expertise in joinery and timber framing techniques. Be honest about your comfort level with these skills.
Cost Comparison
DIY saves labor costs ranging from $3,000 to $8,000. You will need to invest in tools, though. Professional crews provide warranties and quality assurance. They also guarantee faster completion.
Making Your Choice
Evaluate your abilities honestly. Consider your available time and budget constraints. Then decide which path fits your situation best.
Seasonal Damage: Rain, UV, Freeze-Thaw, and How to Prevent It
Timber frame pavilions face four main threats year-round. Water finds its way into joints and fasteners. UV rays slowly fade and weaken surface fibers. Freeze-thaw cycles crack wood as trapped moisture expands and contracts. Wood rot follows when these conditions persist.
Prevention starts with simple habits. Apply water-repellent sealants once a year. Add gutters and drainage to move water away. Choose UV-protective stains for sun-exposed areas. Keep the space underneath well ventilated.
Check joints, connections, and roof areas each season. Small problems grow fast. Fix them early to avoid costly structural repairs later.
True Project Cost: Adding Up Permits, Delivery, Tools, and Labor
Most pavilion kit buyers underestimate the total investment. The kit price is just the starting point.
Building permits typically run $200 to $1,500. Costs vary by location and structure size. Check local requirements early to avoid surprises.
Delivery fees add $500 to $2,000. This covers transportation and site placement. Ask your supplier for exact rates before ordering.
Required tools can strain your budget. Concrete mixers, power drills, and specialized saws may need rental. Expect $300 to $800 for equipment.
Labor expenses vary most widely. Professional installation ranges from $3,000 to $15,000. Foundation work and site grading cost extra.
Smart buyers plan ahead. Request itemized quotes from contractors. Factor in permit costs and local regulations. Budget 40 to 60 percent above the kit price for full completion.
Can You Customize? Design Freedom vs. Standard Kit Constraints
Understanding Customization Limits
Most pavilion kits come with fixed options. You can usually choose from standard sizes, roof styles, and wood types. That is where the flexibility ends for many manufacturers.
Some companies do allow changes. Dimension adjustments or material swaps might be possible. Expect to pay extra for these modifications.
When Customization Gets Complicated
Significant design changes present challenges. Altered post placements, extended overhangs, or custom roof angles require more than a simple swap. These requests drive up costs and extend timelines considerably.
Standard kits work well because they are efficient. Customization disrupts that efficiency. Engineering reviews and new cutting specifications become necessary.
Smart Buying Strategies
Ask specific questions before you purchase. What customization options exist? What fees apply? How long will changes take?
Compare manufacturers directly. Flexibility levels vary significantly. Finding the right match for your project needs takes research, but it pays off.
Manufacturer Credibility: Red Flags, Warranty Terms, and Customer Reviews
Selecting a Pavilion Kit Manufacturer
Start by looking at warranty coverage. How long does it last? What does it cover? Check for material defects and labor costs. These details matter more than you might think.
Customer feedback comes next. Look at independent review sites like Trustpilot and Google. Patterns in complaints tell you a lot. One bad review is noise. Ten similar complaints signal trouble.
Spotting Red Flags
Watch for missing contact information. Be wary of prices that seem too good to be true. Vague specifications are another warning sign. These often point to bigger problems down the road.
Established companies like Summerwood and Timberlodge set a higher standard. They keep transparent policies. Their track records are documented and available.
Doing Your Homework
Ask for references from past buyers. Verify business licenses. Check Better Business Bureau ratings. Then pick up the phone. Call manufacturers directly with specific questions. Their responses will tell you everything you need to know before you buy.
Frequently Asked Questions
How Long Does a Timber Frame Pavilion Typically Last With Proper Maintenance?
With proper maintenance, timber frame pavilions typically last 50 to 100 years or longer. Longevity depends on wood species, climate conditions, protective finishes, and regular upkeep including inspections, resealing, and repairs.
What’s the Resale Value Impact of Adding a Pavilion to My Property?
Like a well-tended garden that draws admirers, pavilions enhance property appeal. Studies show outdoor structures typically increase resale value by 5-15%, depending on construction quality, location, and local market demand for entertainment spaces.
Can I Relocate or Expand My Pavilion Kit After Initial Installation?
Relocating a timber frame pavilion kit is challenging due to its permanent foundation requirements and structural complexity. Expansion is possible but requires professional assessment of the original design’s load-bearing capacity and structural integrity before modifications.
Do Timber Frame Pavilions Require Special Insurance Coverage or Liability Considerations?
Like a medieval craftsman filing modern permits, property owners must contact their insurance provider about pavilion coverage. Most standard homeowner policies require endorsements for permanent structures, while liability considerations depend on public access and intended use.
What Financing or Payment Plan Options Do Manufacturers Typically Offer?
Manufacturers typically offer financing through third-party lenders, installment payment plans, and sometimes in-house financing options. Many provide flexible terms, including down payment requirements and extended payment schedules to accommodate various budgets.
Conclusion
Purchasing a timber frame pavilion kit requires balancing wood selection, joinery type, site preparation, and permit requirements against total project costs. As the saying goes, measure twice, cut once—thorough planning prevents expensive mistakes. Buyers should verify manufacturer credibility, clarify customization limits, and budget for hidden expenses like delivery and labor. Understanding these factors guarantees a functional, durable pavilion that meets both aesthetic and structural needs.